Saturday, September 10, 2011

Perfect Party Drink for True Blood's Season 4 Finale or Your Halloween Party!

My friends and I love the HBO series True Blood based off of the infinitely better book series by Charlaine Harris, The Sookie Stackhouse novels.  Each Sunday night we excitedly wait for an episode to air (like vamps wait in their coffins for the sun to set!)


Recently we created the most temping drink to sate our thirsts before the show started.  ;)  (I'm really getting into this vampire theme)!  We call it V (it's what Vampire Blood is called on True blood).  


V would be great for your own True Blood party/marathon or upcoming Halloween party!


Start by making 1 large box of your favorite flavor of any red jello (cherry, strawberry, even raspberry can work great!).  Strawberry was our favorite flavor to use.  


Let the jello set up until it's jello and then deposit spoonfuls of it onto a flat plate (we found that making the jello in a casserole dish cuts out this step).  


Use a fork to go through and make 'vampire guts' (what True Blood's director Alan Ball thinks vampires look like when they meet their demise).


Spoon the vamp guts into clear cups.


Then fill the cups up with your favorite fizzy red drink (half jello, half fizzy drink).  In our trials we tried sparkling blood orange and sparkling cranberry and then Faygo red pop.  Faygo won!  It tasted the best with our strawberry 'guts'.  


Mmmmm, bloody!  


This taboo drink was easy to make and waaay fun to drink; probably a good one to make with kids as well :)  If you wanted to add a little adult into the mix you could probably follow a jello shot recipe for when you prepare the drink's innards!


Until next time, enjoy your V and the season finale of True Blood season 4!


Note: Me (left in the black and coral) and Arika (mid-right in the white and blue) worked together to perfect this recipe. Our men happily volunteered to be 'scary' in this photo ;).  Check out Arika's blog, Happy Home!  


Friday, April 29, 2011

You know you make me want to Grout!

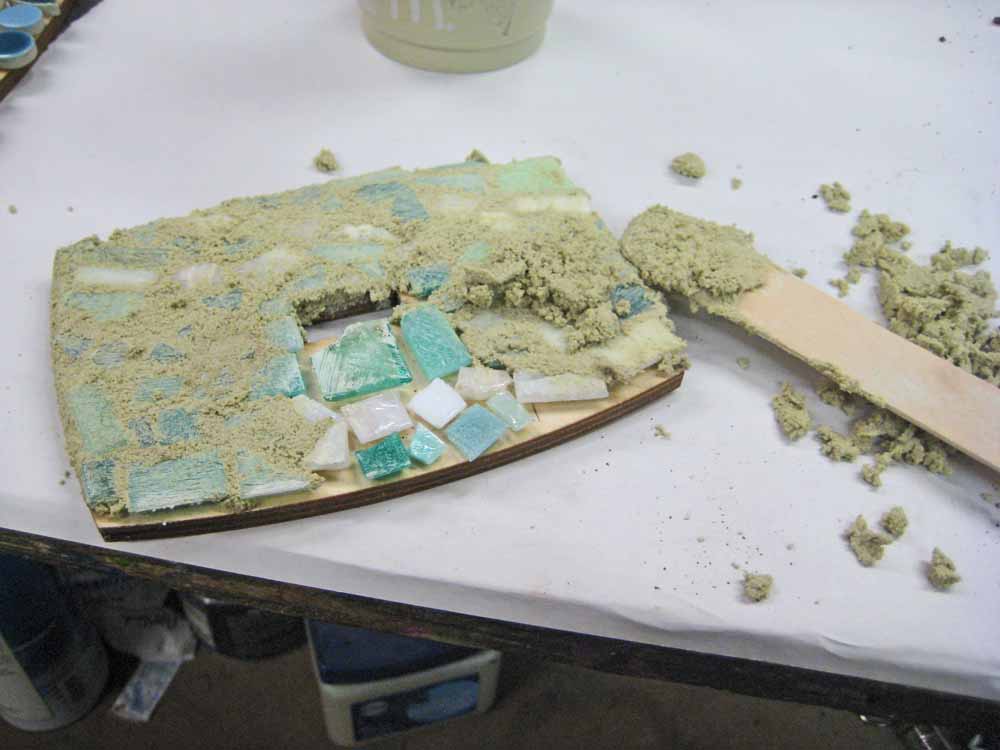
My mosaic pieces have been grouted!  The whole process was a lot easier than I thought it would be.  Basically you make brownie mix consistency grout by adding whatever color dry grout you want and water:


Then you cover the piece with the mix:


I used a popsicle stick to spread the grout on:


let it sit for 5-10 minutes and then wipe off the excess with a dry cloth:


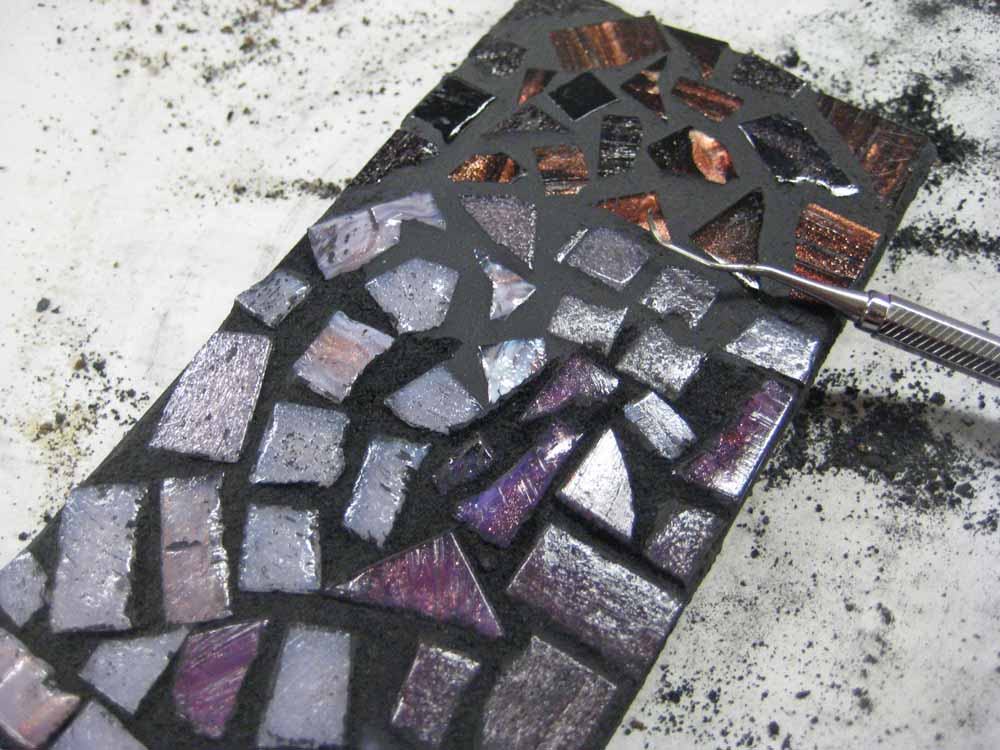
Sometimes you want to make your glass underneath stand out more so you can go through after it's dried & you've wiped it to define the shapes better with a sharp tool:


Fun fun!  Looks like some moms I know are getting some nice Mother's Day gifts....

Monday, April 25, 2011

Some pretty eggs! :)


This year I decided to try 'marbling' my eggs and I think that they turned out great!  


I started with a plan old egg dyeing kit and dyed almost all of my eggs a lighter color

Then I dumped about a table spoon of vegetable oil into the dye and mixed it up.  


I re-dyed the eggs in different colors and the oil spots made some cool effects!


I hope this post inspires you to try this too!  When is eating fun colored eggs not in season? ;)

Friday, April 1, 2011

Cookie Adventure! :)


I had an amazingly good cookie about 5 years ago.  It was a chocolate dough cookie with what tasted like oreo filling inside in little chunks.  I was in love with the taste, but not with the price.  

Since I tasted this delicious cookie, I've been on a mission to find out what it was and how to make it myself.  I finally figured it out!  

It's a chocolate, white chocolate chip cookie.  If you've never had it (or even if you have) here's the recipe below.  Enjoy :)

Chocolate, White Chocolate Chip Cookies!
Ingredients: 

·         1/2 cup salted butter, at room temperature (important!)
·         3/4 cup white granulated sugar
·         1 large egg
·         1/2 teaspoon pure vanilla extract
·         1 cup all purpose flour
·         1/4 cup cocoa powder
·         1/2 teaspoon baking soda
·         1/8 teaspoon salt
 1 and 1/2 cups white chocolate chips

Directions:
Preheat oven to 350 degrees F 
In a large bowl, cream the butter and sugars until fully incorporated. Add the egg and vanilla extract and blend.

In a smaller bowl add the cocoa powder, flour, baking soda, and salt and whisk until the dry ingredients are well mixed. 

Add about half of the flour mixture to the butter and egg mixture, incorporate, and then add the rest until all ingredients are blended well.  Now add the white chocolate chips until they're all throughout the dough.

Using a small ice cream scoop or two spoons, place about 1 1/2 tablespoons of the cookie mix recipe onto a foil covered cookie sheet about 2 inches apart.  Press the cookies down until about half the height.

Bake for approximately 8 minutes or until the cookies are still soft in the center but are firm around the edges. Remove from oven and let cookies cool on baking sheet for about 5 minutes before removing the cookies to a wire rack to cool completely.

This recipe makes about 24, 3 inch round chocolate, white chocolate chip cookies.


The cookie recipe listed on this post was adapted from Home Life Weekly's recipe


Tuesday, March 22, 2011

Mosaics! A Beginner's Adventure!


The past few weeks in art class we've been working on creating mosaics!  This is a project that I've always wanted to try!!!


My art teacher described this form of art as "gluing sh*t down!"  And that's exactly what we did ;)


I picked out pieces of glass in the same color family and started gluing it down with mosaic glue (you should be able to find this at your local craft store).  


I used a paint brush to apply the glue to the textured side of the piece of glass and stuck it on-smooth side up.  When I asked why we do texture side down, I was told that when we grout these babies the grout will be harder to get out of the textures pieces.

Here's some other pieces: (I'm excited to show you!)

(A bloom for spring!)


(The brown is the beach and the blue is the water & sky)

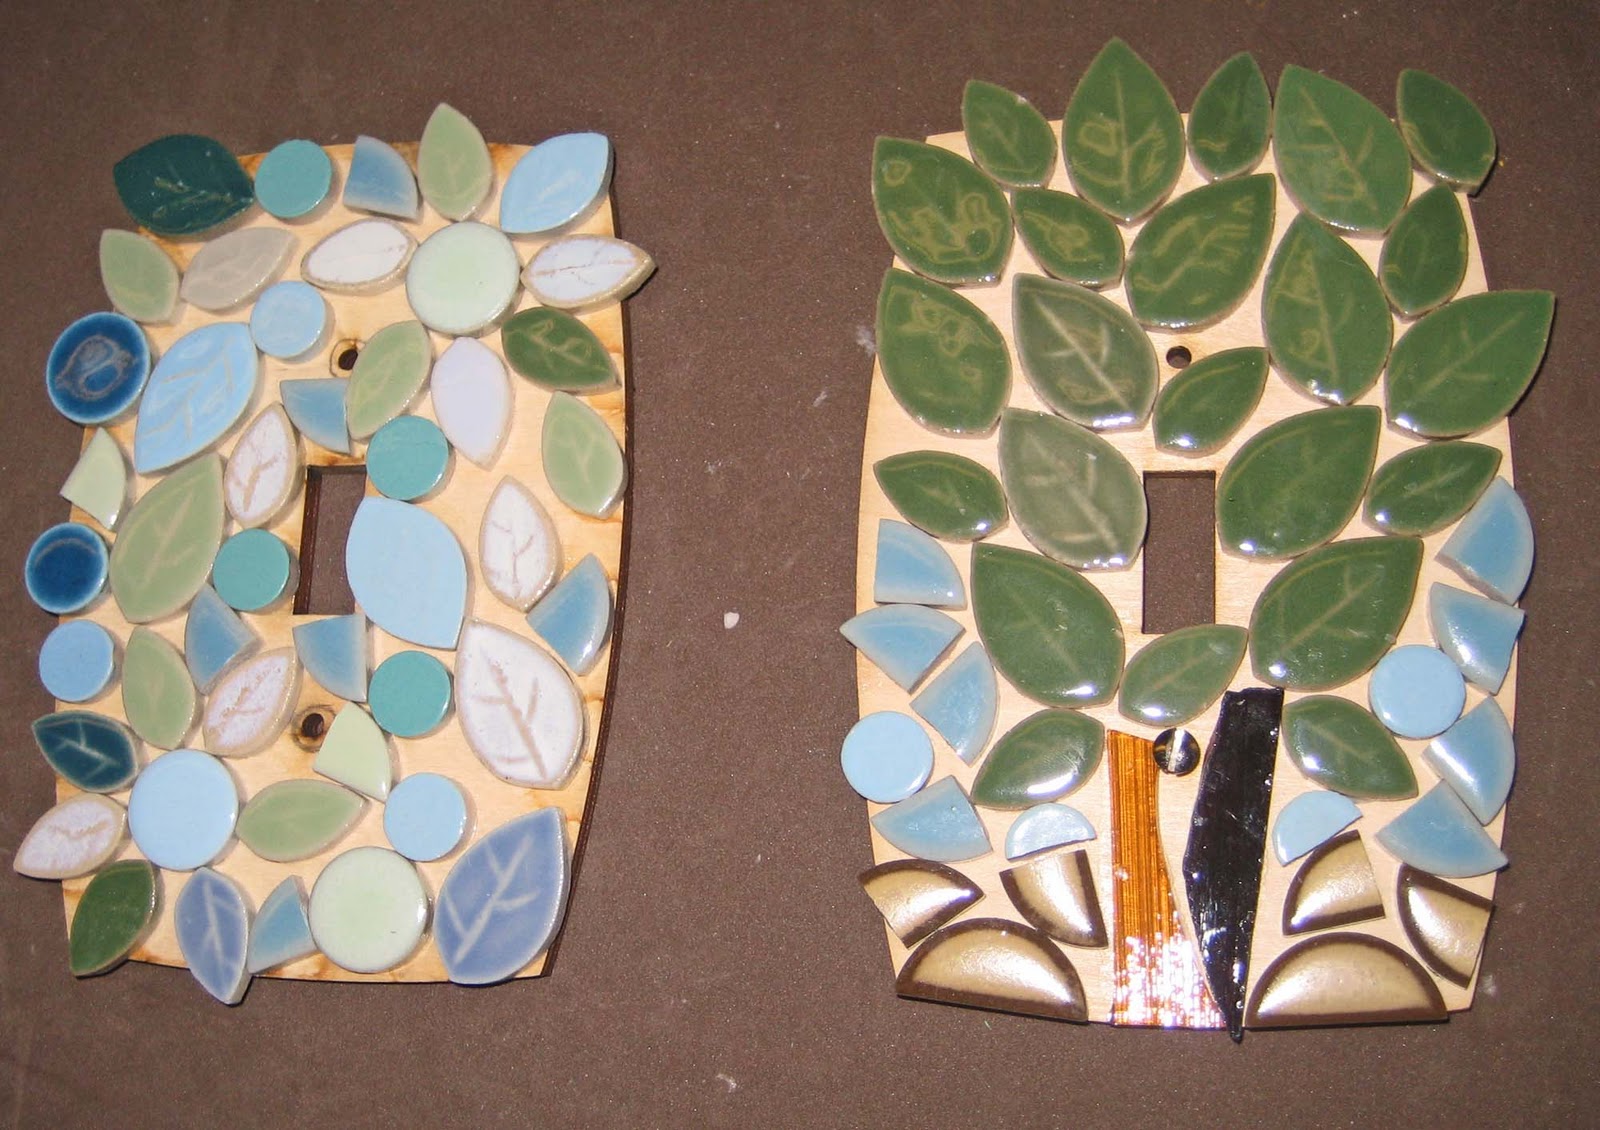
(A fellow classmate did these 2 with shaped ceramic tile pieces)

Well, stay tuned!  We're supposed to grout our pieces on Wednesday night so I will post the finished products soon after that :)

Wednesday, March 2, 2011

What We Made in Art Class Tonight! (UPDATE!)

I tried using squares of news print to make these flowers and I think I like using the news print even better than the printed paper!


I made one for my Grama out of the crosswords section because I know she likes those ;)  I like that I can personalize my flowers for who I'm going to give them to with by using magazines or news papers; more so than with generic printed paper.


----


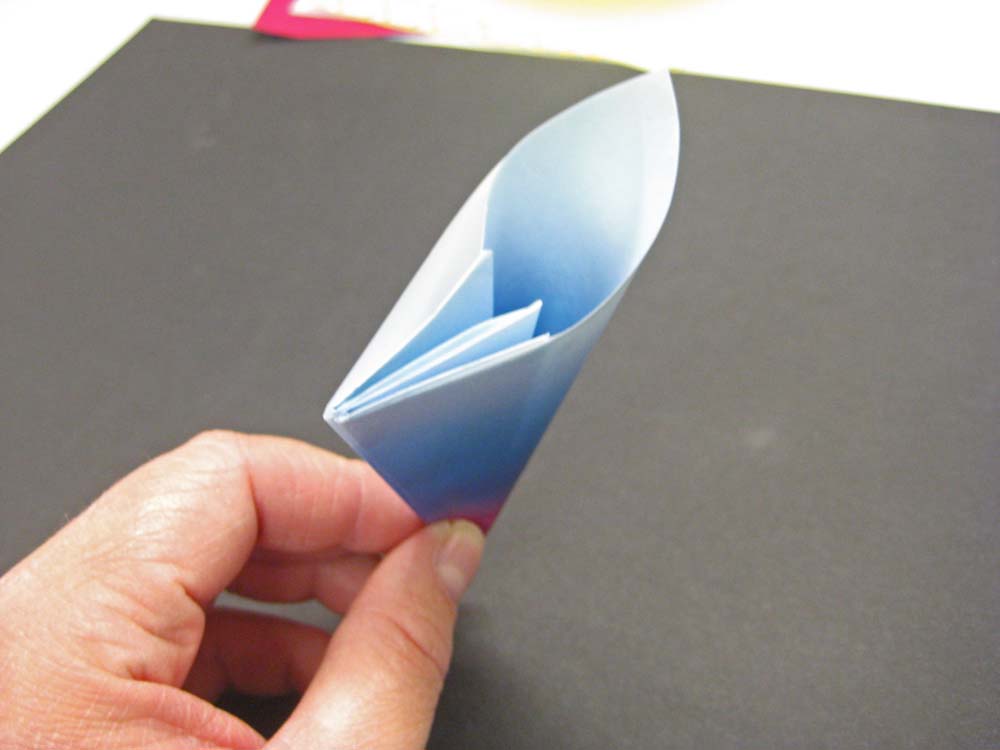
Tonight we made paper flowers to try and encourage more spring timey weather!  Our teacher showed us this cool origami pattern...


Though my pic's are pretty, I'll admit that they are not the easiest to follow.  Here's a link to an Wiki How article with more specific instructions on how to make this Kusudama flower.


We used patterned, square-shaped paper in 3 inch and and 1.5 inch squares.  Our teacher got these papers from online, but you can probably find them a your local craft store.  I also think cutting out newspaper squares would be pretty neat looking too!


Tip: I noticed that when I used the smaller paper I needed 6 petals instead of the 5 I used in making the larger petals.


I made these two beauties by sticking pipe cleaners through the middle and curling the stem :)


I hope this encourages you to try this project.  When I first started I was worried, but after my first petal I got the hang of it pretty well!  Give it a try ;)

What We Did With Our Painted Fabric


After painting in our fabric in art class we used thick, colorful string to sew these onto cut pieces of felt and pieces from felted sweaters! Very green ;)


This person made some trivets:


My favorite classmate (my sister) took my pieces of painted fabric, (which I had cut in semi circles) and sewed them into these cool little petals :)


I think I might glue these onto a head band :) ...hopefully I'll post that project's results soon!

Tuesday, February 15, 2011

Are you reMARTHAble?!

Martha Stewart is having a contest to find crafty people like herself to come on her show and present their projects!!!  Are you the Martha in your circle of friends?  Enter her contest!!! Simply reMARTHAble


Some of you may know that one of my biggest wishes is to meet Martha and be on her show.  Do you have any favorite blog posts that you think I should enter?  Let me know :)  Thanks!

Tuesday, February 8, 2011

Make sure you ask for this when you do your taxes this year!!! Potentially large credit for you!

The Earned Income Tax Credit (EITC) is the name of the game!  This credit is available to you (in the US) if you are 'moderate or low income' and have made income in 2010.  That's right, you could qualify to get a substantial credit just for working!


Moderate or low income covers more people than you'd think-I happily took advantage of the EITC last year and a received a $400 tax credit!  (Please note: a tax credit is different than a refund.  A tax credit is a reduction of what you may owe and a refund is the $ you will receive back if you qualify).  Some family members of mine received an $800 tax credit each last year because of the EITC!  


If you want more info please go to the IRS website: http://www.irs.gov/individuals/article/0,,id=96406,00.html


I say 'please' because last year I spoke with an IRS rep. who said that the US Federal Govt. is thinking about getting rid of the EITC because not enough people are aware of it and using it!  The horror!!! 


Please use this so we don't loose it!  It's the clever thing to do ;)

Saturday, February 5, 2011

Chocolate Wands!


Mmmm don't these look good? ;)  They are yummy, easy to make, and fun to eat!  

I started with a cooling rack loaded with mini stick pretzels


Then I used my make shift double boiler.  I took a small pot, filled it half way with water, put it on med-high heat, stuck a thick ceramic bowl on top, and added my chips.


I stirred these pretty consistently until they melted


Then, (using a potholder because this bowl is hot!) I brought the chocolate over to the table.  I swirled and molded one pretzel tip at a time with chocolate...


And then dipped the tip into a container of sprinkles to coat


I let the chocolate cool on the cooking rack


And then arranged them for serving :)  These make for some clever finger foods with just the right amounts of salty and sweet.  If you want to try this project with some alterations you could use white chocolate, big pretzels sticks, let your imagination go! :)