Tuesday, March 22, 2011

Mosaics! A Beginner's Adventure!


The past few weeks in art class we've been working on creating mosaics!  This is a project that I've always wanted to try!!!


My art teacher described this form of art as "gluing sh*t down!"  And that's exactly what we did ;)


I picked out pieces of glass in the same color family and started gluing it down with mosaic glue (you should be able to find this at your local craft store).  


I used a paint brush to apply the glue to the textured side of the piece of glass and stuck it on-smooth side up.  When I asked why we do texture side down, I was told that when we grout these babies the grout will be harder to get out of the textures pieces.

Here's some other pieces: (I'm excited to show you!)

(A bloom for spring!)


(The brown is the beach and the blue is the water & sky)
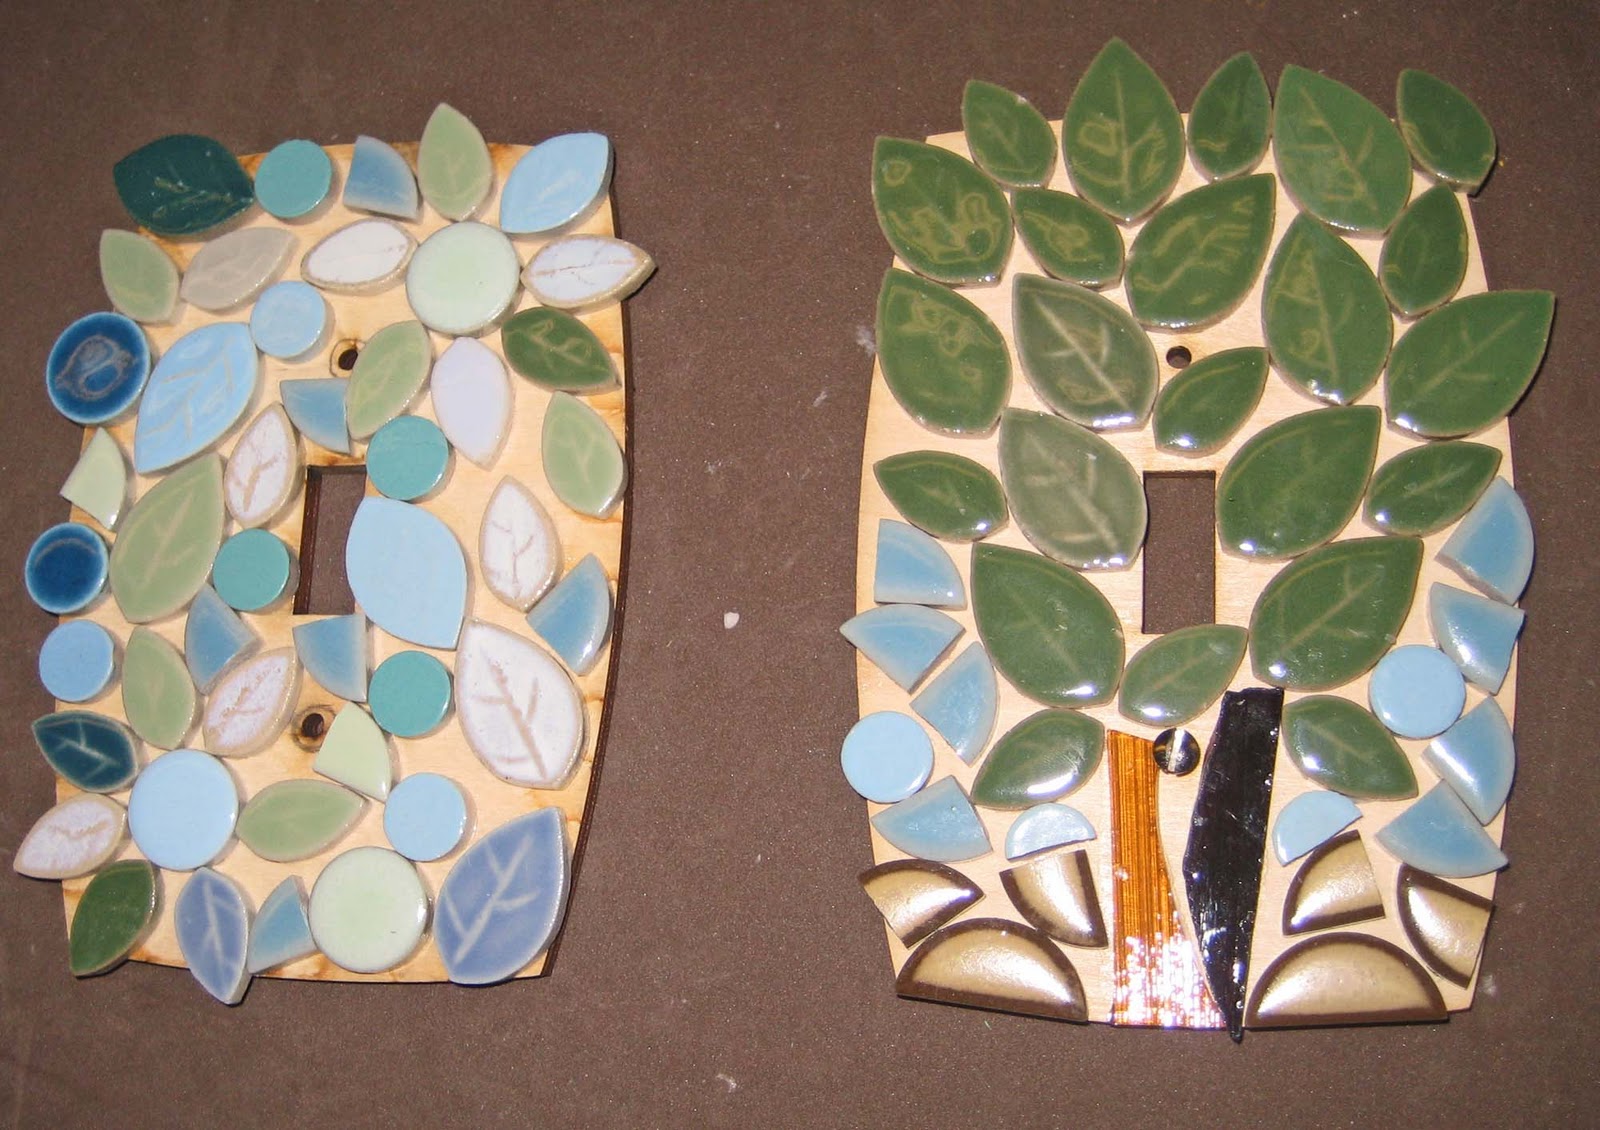
(A fellow classmate did these 2 with shaped ceramic tile pieces)

Well, stay tuned!  We're supposed to grout our pieces on Wednesday night so I will post the finished products soon after that :)

Wednesday, March 2, 2011

What We Made in Art Class Tonight! (UPDATE!)

I tried using squares of news print to make these flowers and I think I like using the news print even better than the printed paper!


I made one for my Grama out of the crosswords section because I know she likes those ;)  I like that I can personalize my flowers for who I'm going to give them to with by using magazines or news papers; more so than with generic printed paper.


----


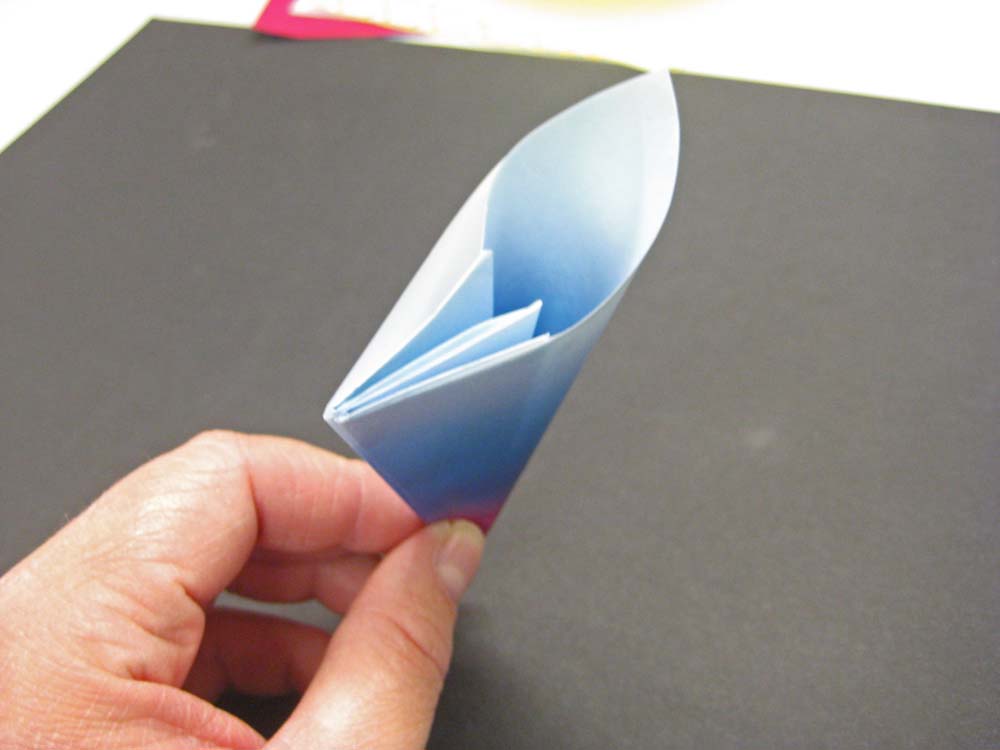
Tonight we made paper flowers to try and encourage more spring timey weather!  Our teacher showed us this cool origami pattern...


Though my pic's are pretty, I'll admit that they are not the easiest to follow.  Here's a link to an Wiki How article with more specific instructions on how to make this Kusudama flower.


We used patterned, square-shaped paper in 3 inch and and 1.5 inch squares.  Our teacher got these papers from online, but you can probably find them a your local craft store.  I also think cutting out newspaper squares would be pretty neat looking too!


Tip: I noticed that when I used the smaller paper I needed 6 petals instead of the 5 I used in making the larger petals.


I made these two beauties by sticking pipe cleaners through the middle and curling the stem :)


I hope this encourages you to try this project.  When I first started I was worried, but after my first petal I got the hang of it pretty well!  Give it a try ;)

What We Did With Our Painted Fabric


After painting in our fabric in art class we used thick, colorful string to sew these onto cut pieces of felt and pieces from felted sweaters! Very green ;)


This person made some trivets:


My favorite classmate (my sister) took my pieces of painted fabric, (which I had cut in semi circles) and sewed them into these cool little petals :)


I think I might glue these onto a head band :) ...hopefully I'll post that project's results soon!

Tuesday, February 15, 2011

Are you reMARTHAble?!

Martha Stewart is having a contest to find crafty people like herself to come on her show and present their projects!!!  Are you the Martha in your circle of friends?  Enter her contest!!! Simply reMARTHAble


Some of you may know that one of my biggest wishes is to meet Martha and be on her show.  Do you have any favorite blog posts that you think I should enter?  Let me know :)  Thanks!

Tuesday, February 8, 2011

Make sure you ask for this when you do your taxes this year!!! Potentially large credit for you!

The Earned Income Tax Credit (EITC) is the name of the game!  This credit is available to you (in the US) if you are 'moderate or low income' and have made income in 2010.  That's right, you could qualify to get a substantial credit just for working!


Moderate or low income covers more people than you'd think-I happily took advantage of the EITC last year and a received a $400 tax credit!  (Please note: a tax credit is different than a refund.  A tax credit is a reduction of what you may owe and a refund is the $ you will receive back if you qualify).  Some family members of mine received an $800 tax credit each last year because of the EITC!  


If you want more info please go to the IRS website: http://www.irs.gov/individuals/article/0,,id=96406,00.html


I say 'please' because last year I spoke with an IRS rep. who said that the US Federal Govt. is thinking about getting rid of the EITC because not enough people are aware of it and using it!  The horror!!! 


Please use this so we don't loose it!  It's the clever thing to do ;)

Saturday, February 5, 2011

Chocolate Wands!


Mmmm don't these look good? ;)  They are yummy, easy to make, and fun to eat!  

I started with a cooling rack loaded with mini stick pretzels


Then I used my make shift double boiler.  I took a small pot, filled it half way with water, put it on med-high heat, stuck a thick ceramic bowl on top, and added my chips.


I stirred these pretty consistently until they melted


Then, (using a potholder because this bowl is hot!) I brought the chocolate over to the table.  I swirled and molded one pretzel tip at a time with chocolate...


And then dipped the tip into a container of sprinkles to coat


I let the chocolate cool on the cooking rack


And then arranged them for serving :)  These make for some clever finger foods with just the right amounts of salty and sweet.  If you want to try this project with some alterations you could use white chocolate, big pretzels sticks, let your imagination go! :)

Wednesday, February 2, 2011

Photo Editing Is The Icing On The Cake...Or Cookie!

Recently I had lunch at Panera with a good friend ;)  Before leaving, I purchased a very Valentinesy cookie (heart-shaped, bright pink, sprinkles, etc.-you know!).  As I looked at it more I couldn't help thinking that the cookie was almost a symbol of a shade of femininity and (for lack of a better word) girly.  


When I got home, my partner was looking particularly "manly": dark blue tee, jeans, unshaven, etc.  I asked him to stand holding the Valentinesy cookie over his heart and I took a few pictures of him like that.  My idea for the shoot was that strong "masculine" symbols can and do hold fragile, femininity with great care and in high esteem.    


When I was finished getting my shots I got to do one of my most favorite things in my photography process: viewing and editing.


(This is the photo before any editing)


(This is the photo after using a editing option called "Stamp" on Photoshop Elements 8).  I like that the Stamp feature picked up on fine lines and details while blocking others out.  It made my subject look even more rough and "manly".  Now the hand holding the focal heart is more pronounced and possibly even looks more protective of it.  


After cropping, the photo can take on a completely different story.  This picture could be used to represent loved ones who are far away; holding our hearts; trying keep us near.

I use photo editing to tell a story.  A story can twist, wind, deepen, and go further still past an original photograph.  What's the story you want to tell?

------

If you're looking for lower cost photo editing software try Photoshop Elements.  It's not the full Photoshop, but has it's key features and it costs less.  It's what I use and I'm very happy to have it. 

Picasa and Picnick are two free photo editing programs that I've seen others do amazing things with.  I used Picasa before I purchased PSE.

Tuesday, February 1, 2011

Inspiration!!!

(This photo was edited in PSE using the stained glass window option)


Are you inspired yet?!  ;) 


I really love magazines!  While I'm flipping through them I often find a pictures that make me say, 'hmm, that's neat!'.  When I see something I like, I tear it out and keep it in my 'inspiration file':


I use my file to create paintings based off what I like in the photo.  This helps me when I am staring at an intimidating blank canvas.  When I sift through my file and find something that I really like, I keep it in the forefront of my mind and express it in my painting.


Bright orange color and flower shapes


A fancy headed stalk


A punch of purple and an interesting bulb shape

Another way to capture something that catches my eye is to keep my camera ready!  (pun intended!)  When I see a shape or a pattern on TV, I pause the channel and snap a quick pic:


The stems coming off the center of this piece are simple and most likely something that I can recreate without too much of a headache.   


I hope this encourages you to make your own clever inspiration file! 

Art Class-Week #2: Fabric Painting! (Part 1)

I'm a little late with this blog post-this is what we started on last week in class.  

Last week we started part 1 of a 2 part project.  Part 1: Painting fabric. 


Our instructor asked us to use a plethora of supplies and paints to create interesting patterns on fabric.


This classmate painted different spots on her fabric and then folded it over to create a neat kind of wrinkled look.  She told me her color scheme was inspired by St. Patrick's Day!


Another classmate used plastic shapes to stamp on patterns and mix colors.


I painted a design on one side of my fabric and then folded it over so that both sides had the same image.  I used a few sharpies to color in some of the white space, and then cut shapes out of my fabric.   

For the part 2 of this project this week we're going to use the shapes we cut out for ..... to be continued ;)

Monday, January 31, 2011

:-) Hair Dye Happiness!

Recently I've been wanting to give my hair a color kick.  I used to dye it all the time in college, but haven't colored it in the past couple of years.  I saw an ad in a magazine advertising a new hair dye in a foam version; the foam is advertised not to drip so there's less mess.  Back in college dying my hair was such a fiasco!  Dye drips on the sink, floor, shower curtain, me, etc. so I thought this foam would be an improvement.  

After driving to 3 stores and not being able to find this magic foam dye I was getting a little bummed.  While I was pursing the colors at Kroger I came across a L'Oreal Paris hair dye in a convenient no-drip cream!  I thought, well this will work too! 


I came home, used the cream dye, and have to tell you that I LOVE it!  My color came out great and neither my neck or bathroom are dotted in dye drips ;)  Also, I think the cream conditions better than liquid-based dyes because my scalp is not irritated like it has been with other dyes.  I hope this helps someone out there who's looking for an easier and more clever way to color at home!